You may want to create multiple SSIDs to have a password protected one for your private use. Here is how to do it:
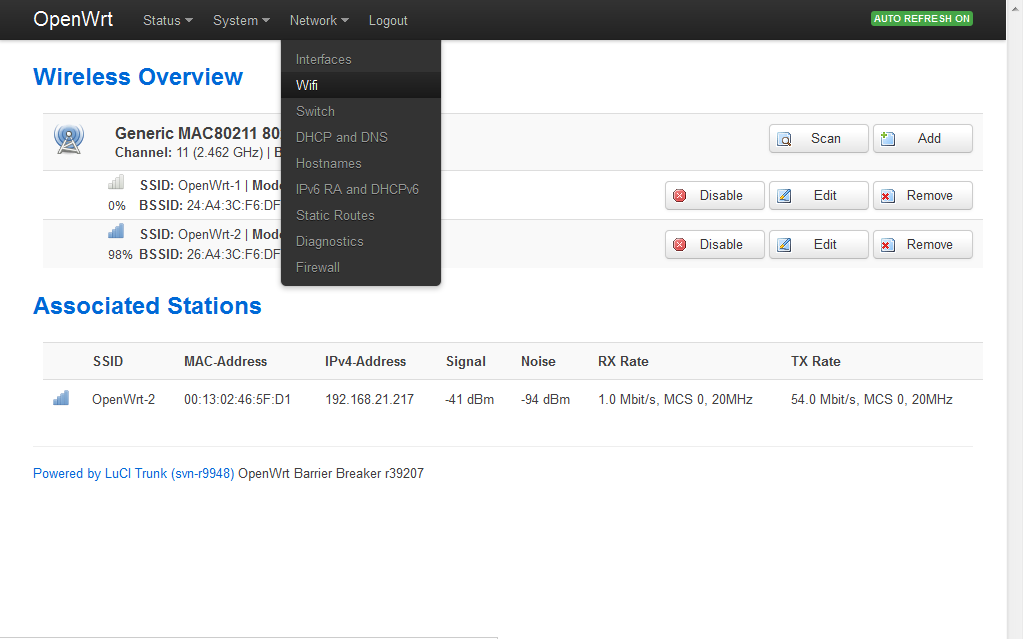
- Navigate to Network > Wifi > click on the Add button.
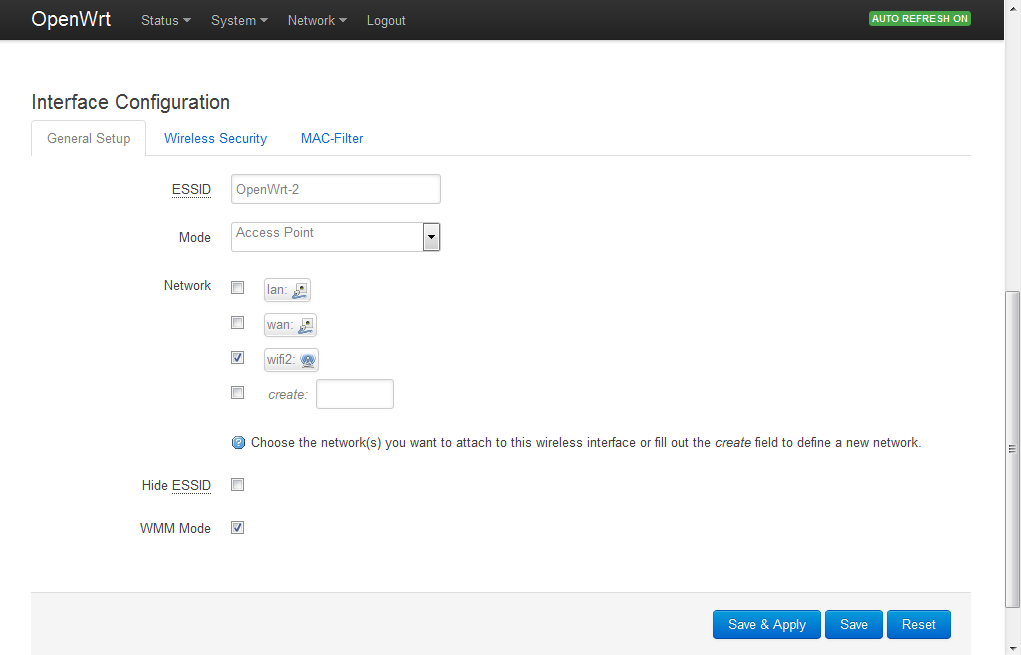
- Once the secondary SSID is created, click on the Edit button on the same page and scroll down to the Interface Configuration section. Edit the ESSID field so you can give it another name e.g OpenWrt-2. Create a new interface by entering a name in the “create” field and by pressing the Save and apply button. In our example we created interface “wifi2″. Make sure this interface is ticked once it is created.Save and apply the settings.
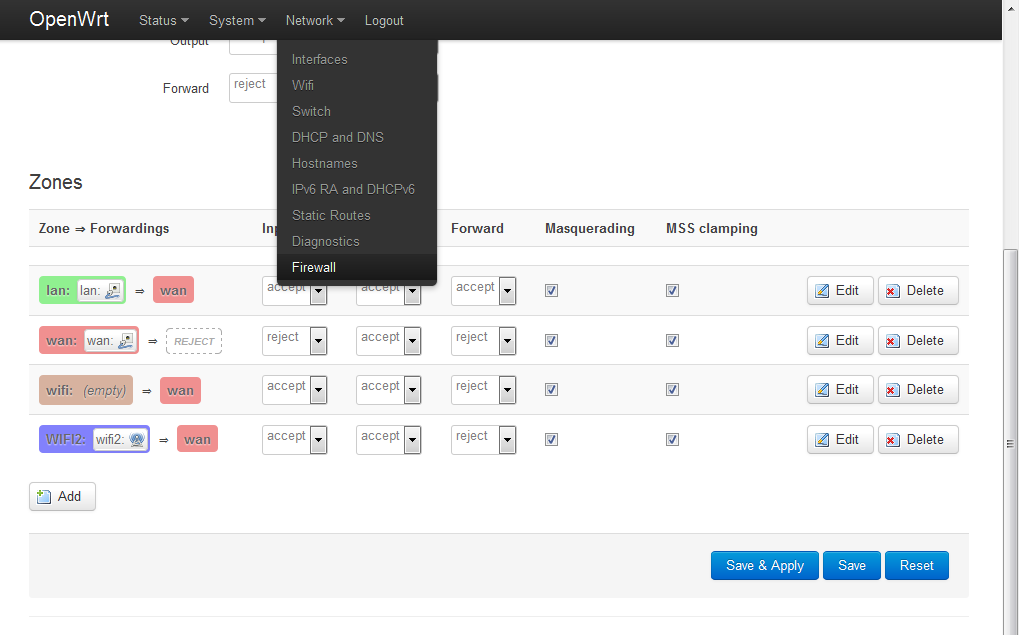
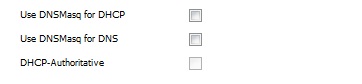
- Navigate to Network > Firewall. Scroll down to the Zones section and make sure you set the settings for the wifi2 interface according to the screenshot:
 Save and apply the settings.
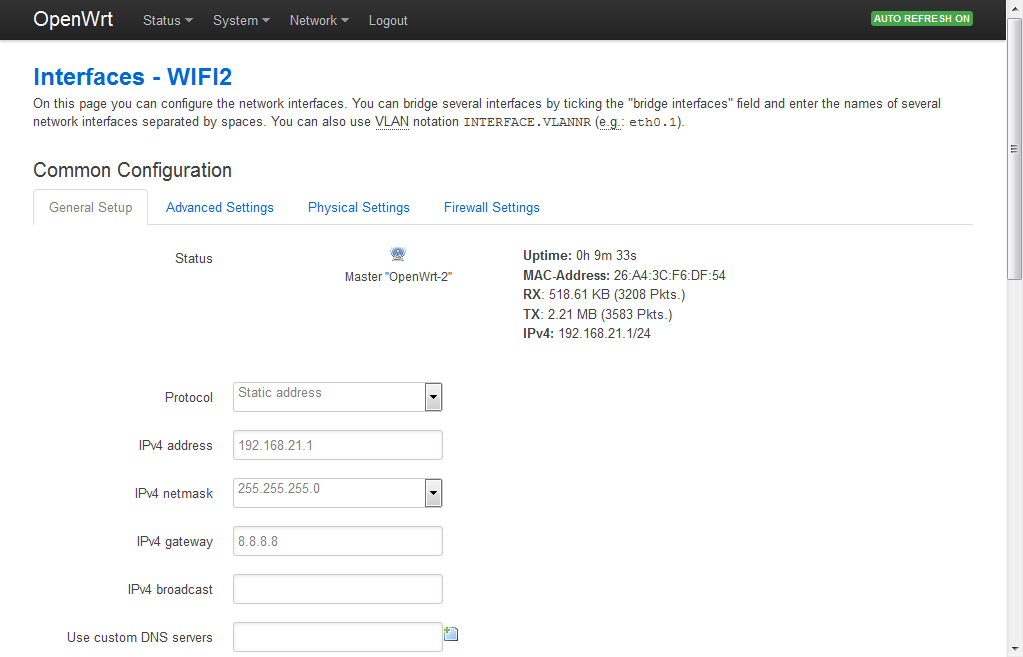
 - Navigate to Network > Interfaces and click on the Edit button for the wifi2 interface. Make sure you the set the settings for the wifi2 interface according to the following two screenshots:

 Save and apply the settings. That’s it! You have created a secondary SSID that is giving free internet connection in openwrt.
Click the Wireless tab and add a new virtual interface. Click add under the virtual interface section. 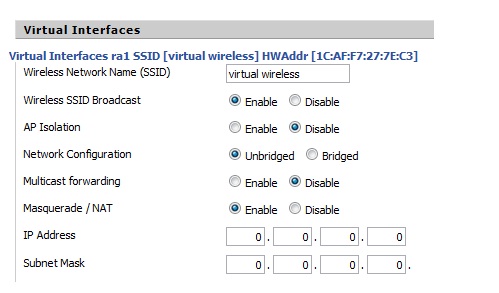
You can also check out this article on dd-wrt’s website: Multiple WLANs
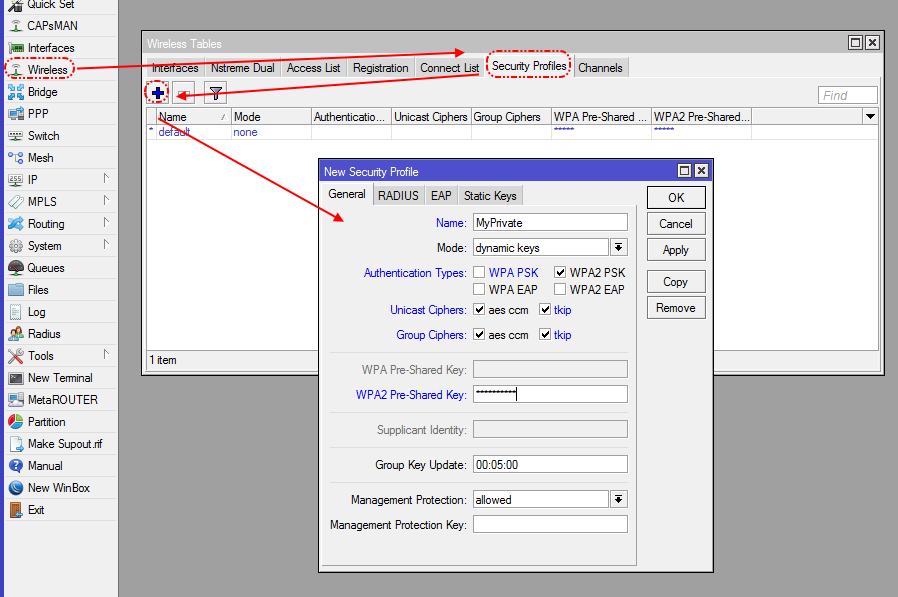
Start WinBox or use WebFig and log in to the router. Click on Wireless -> Security Profiles tab -> click on the + sign and create your security settings (what shall be the encryption type, what shall be the password, etc. – on the screenshot you see a suggested configuration), then click OK
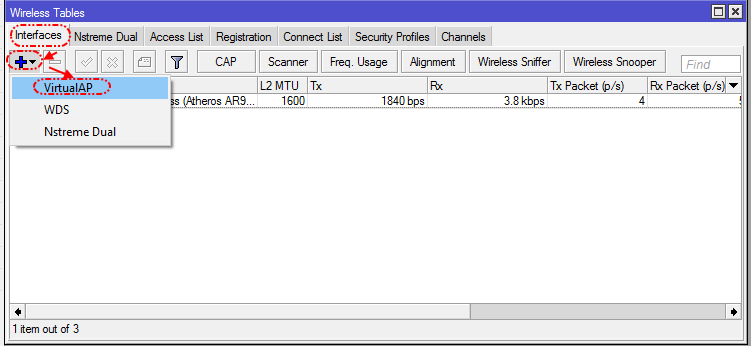
Go back to the Interfaces tab, click on the + sign and choose VirtualAP
In the appearing window set the SSID, set the Master Interface to wlan1 (on dual-band devices usually this is the 2.4 GHz radio interface, wlan2 is the 5 GHz one) and set the Security Profile to the one you have just created, then click OK (please note the name of this newly created wireless interface)

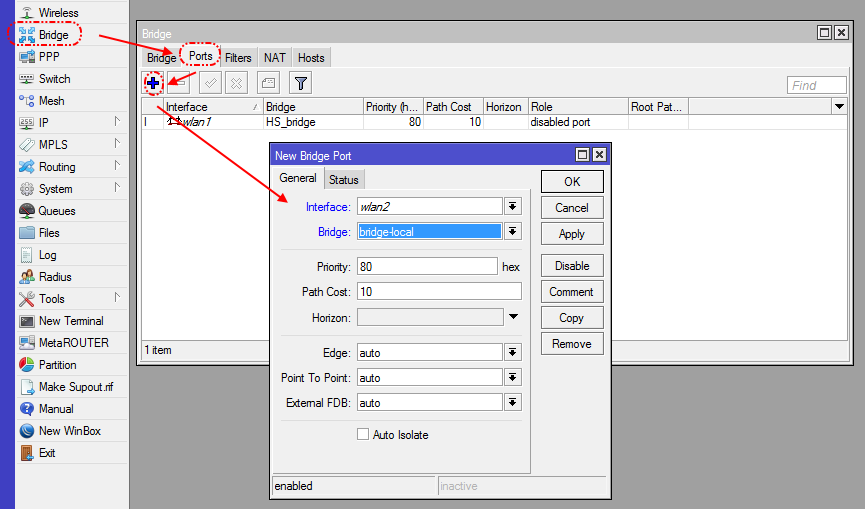
Now click on Bridge -> Ports tab -> click on the + sign and select the newly created wireless interface and assign it to the bridge-local bridge, then click OK
- Log into cloudtrax. https://www.cloudtrax.com/
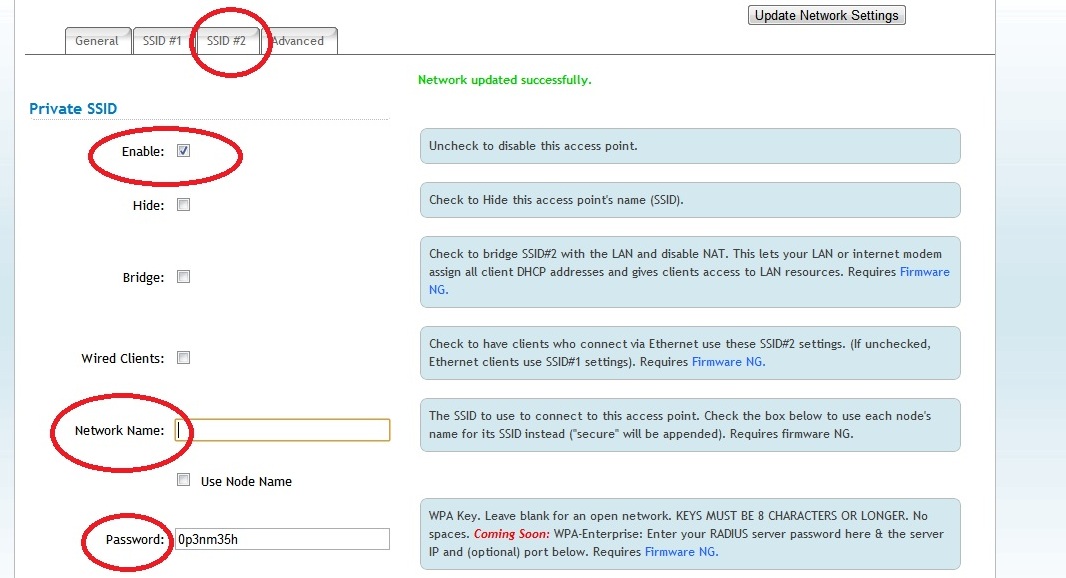
- Click on SSID#2
- Click enable
- Specify network name
- You can optionally either hide the SSID or password protect it
At my side I always use this interactive tutorial : http://www.pennock.nl/dd-wrt/Multiple_BSSIDs.html